Getting Started with Advanced Panelboxes for Confluence
Using the Panelbox Macro
In the editor, type "{panelbox" and choose "Advanced Panelbox".
In the overlay, select a predefined Panelbox in the dropdown (for example: "red").
You may give the panel a title and decide on its alignment. You may also select a title icon or insert an image URL.
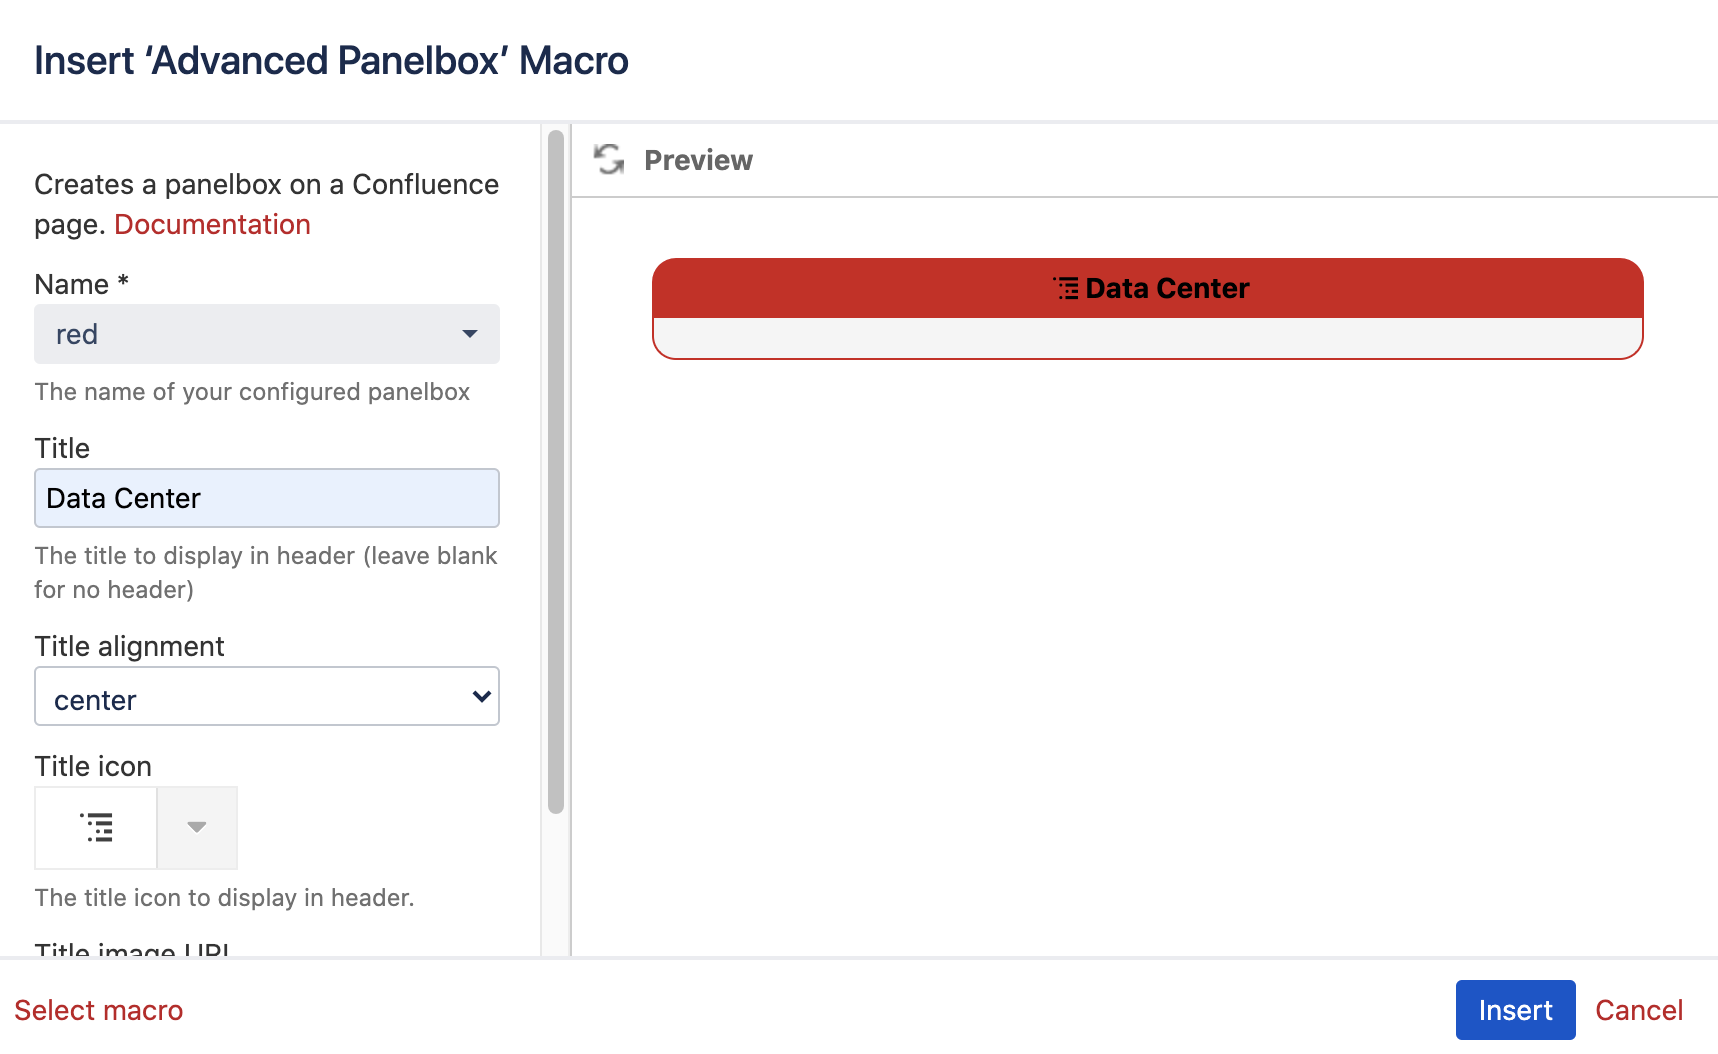
If you like the preview of the Panelbox, click "Insert".
Back in the editor, fill the Panelbox with content.
Publish/update the page when you are done.
The Panelbox "red" is now part of your page.
Configuring Advanced Panelboxes
In the configuration of the Advanceded Panelboxes (in the Administration Console) you can configure the Panelboxes:
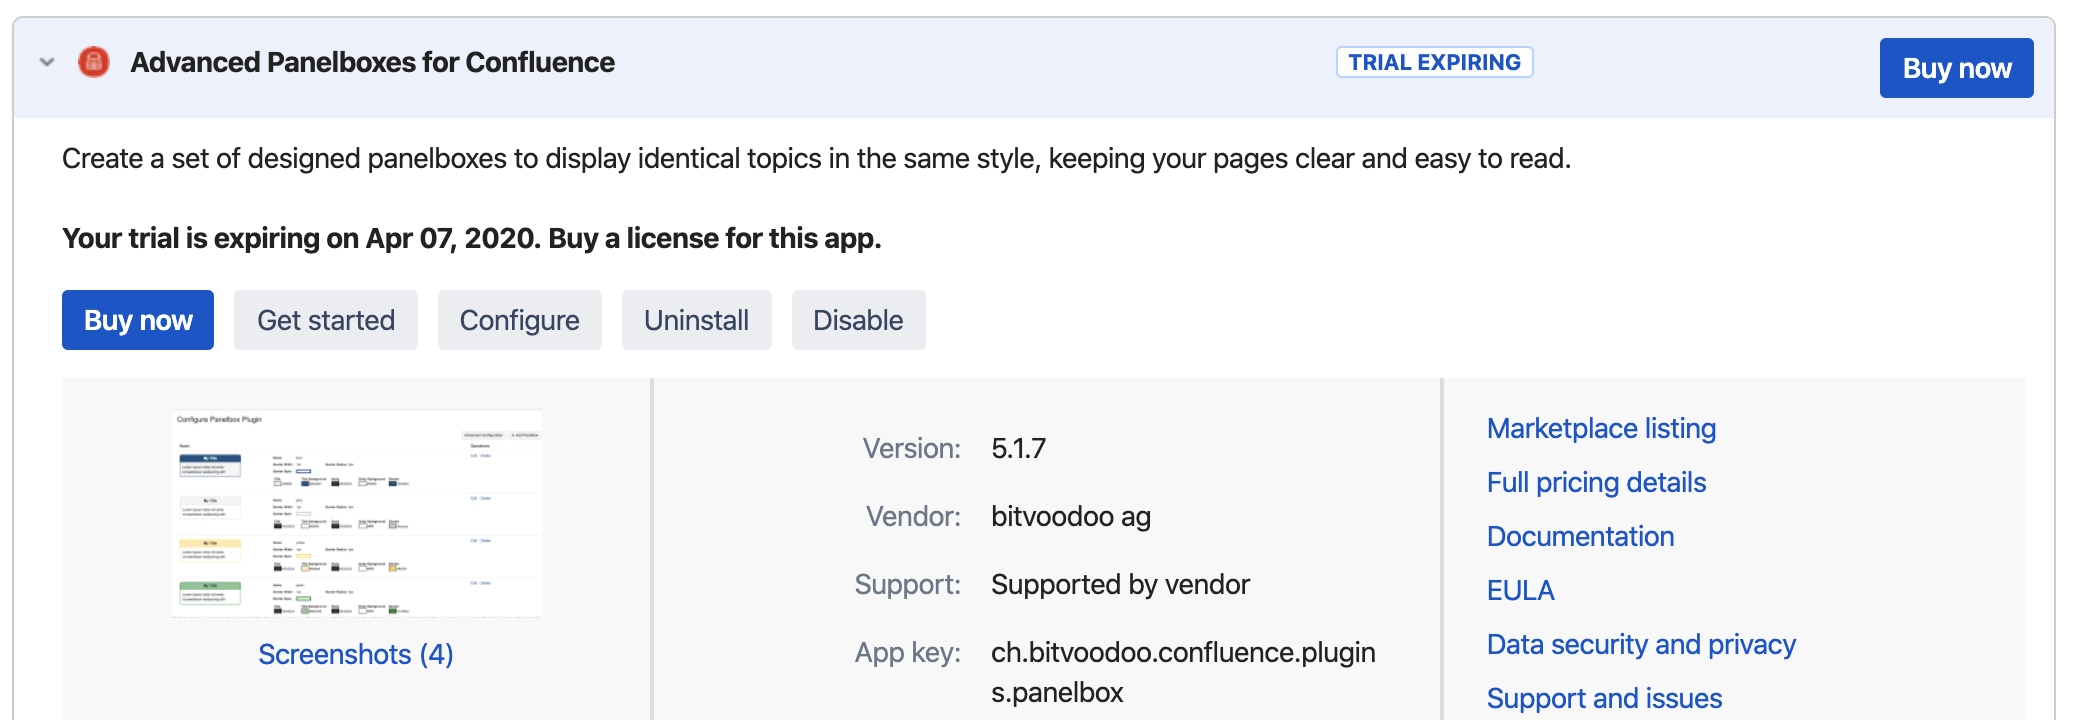
In the app management section, select "Advanced Panelboxes for Confluence" and click on "Configure":
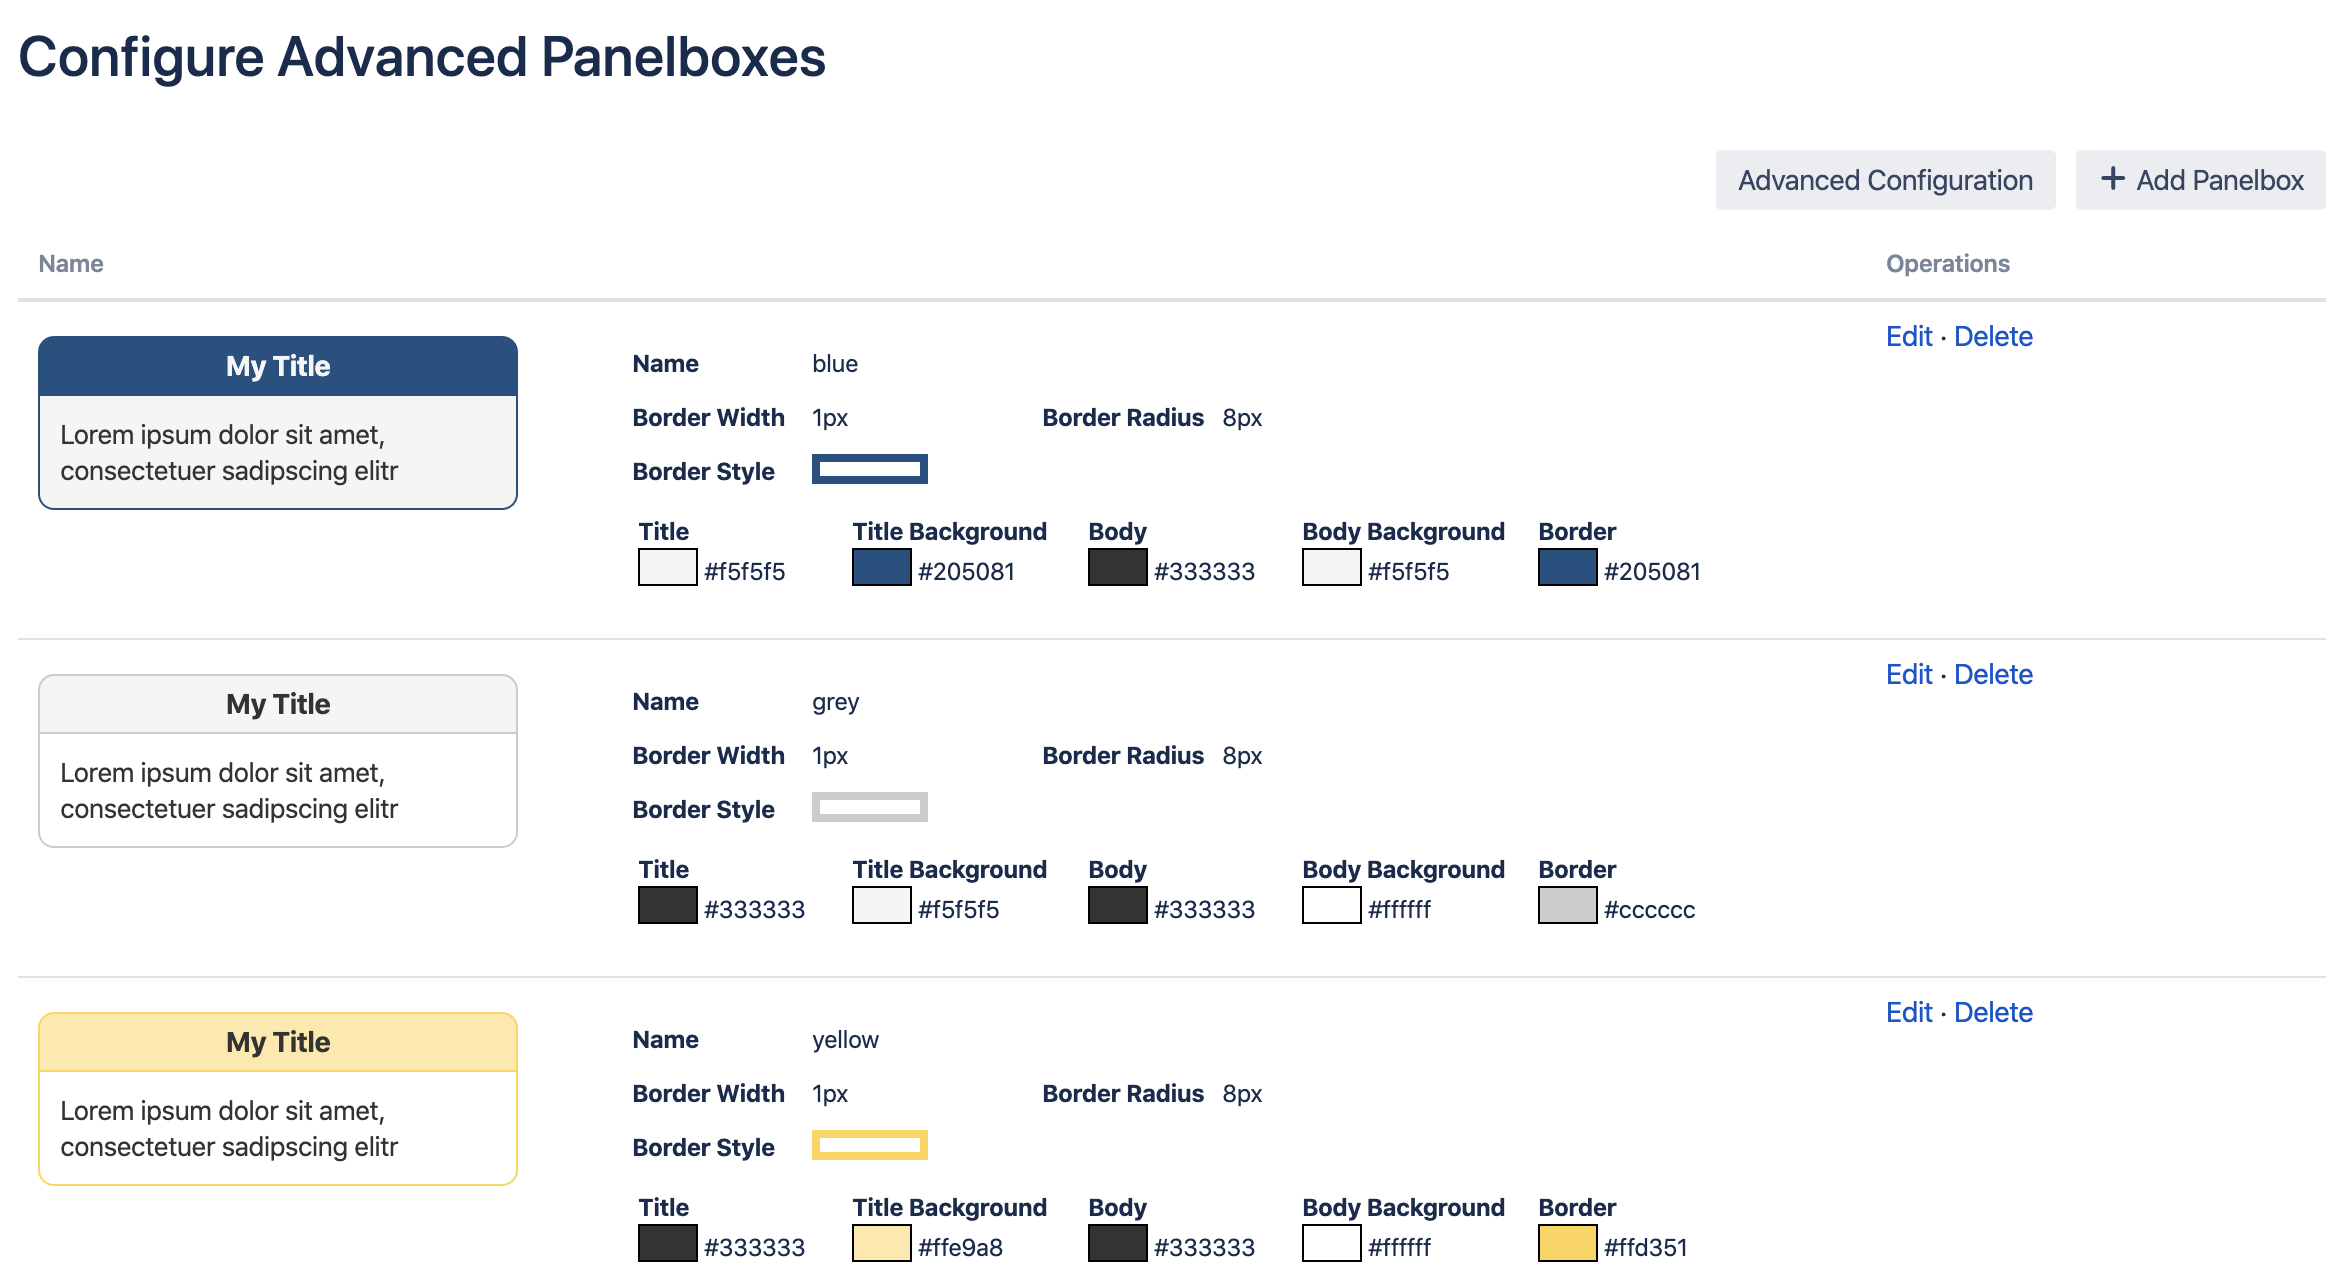
You will now see a list of your individual Panelboxes.
Configuring an existing Panelbox
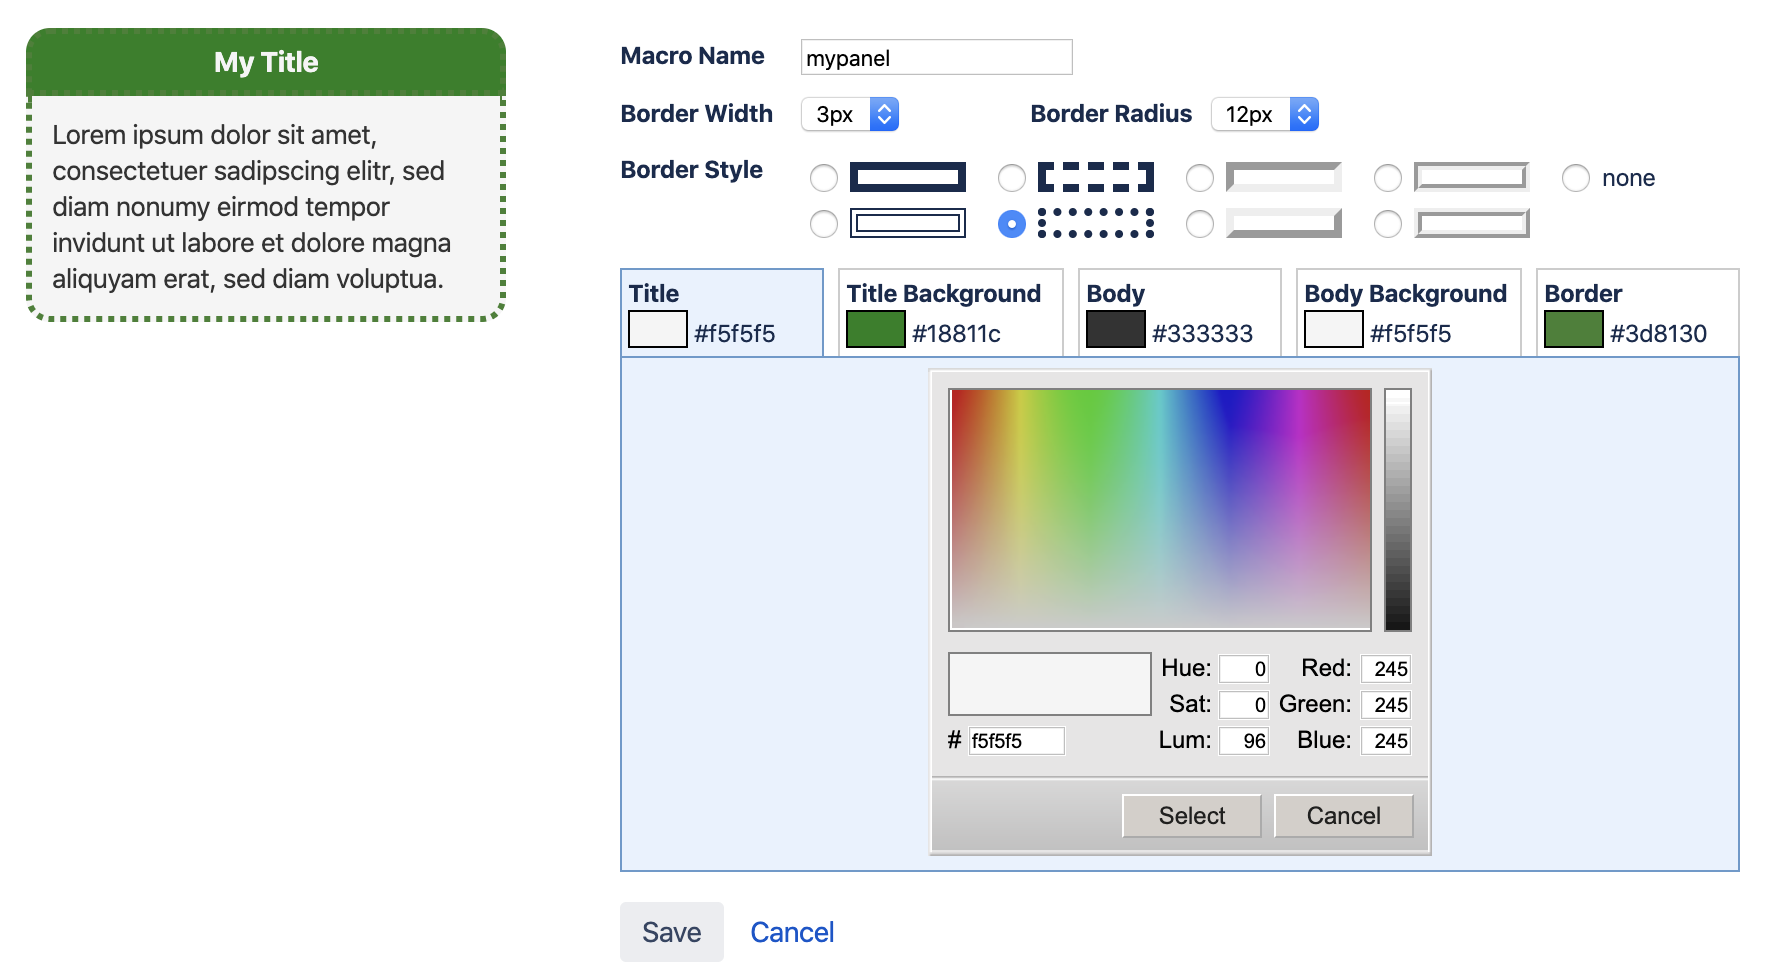
Click on the "Edit" link on the right side of the Panelbox you want to edit:
Change any settings you like, then click the "Save" button.

The new settings will now be applied to all Panelboxes with the name "blue". No need to edit dozens of pages once a setting changes!
Adding a new Panelbox
To create a new Panelbox, click on "+ Add Panelbox".

Scroll down the list until the last entry. This is your new Panelbox. Edit the Panelbox, assign it a new name and new properties.

When you are happy with the preview, click the "Save" button.
Your new Panelbox may now be used anywhere on your Confluence.
Read the complete Adv. Panelboxes documentation